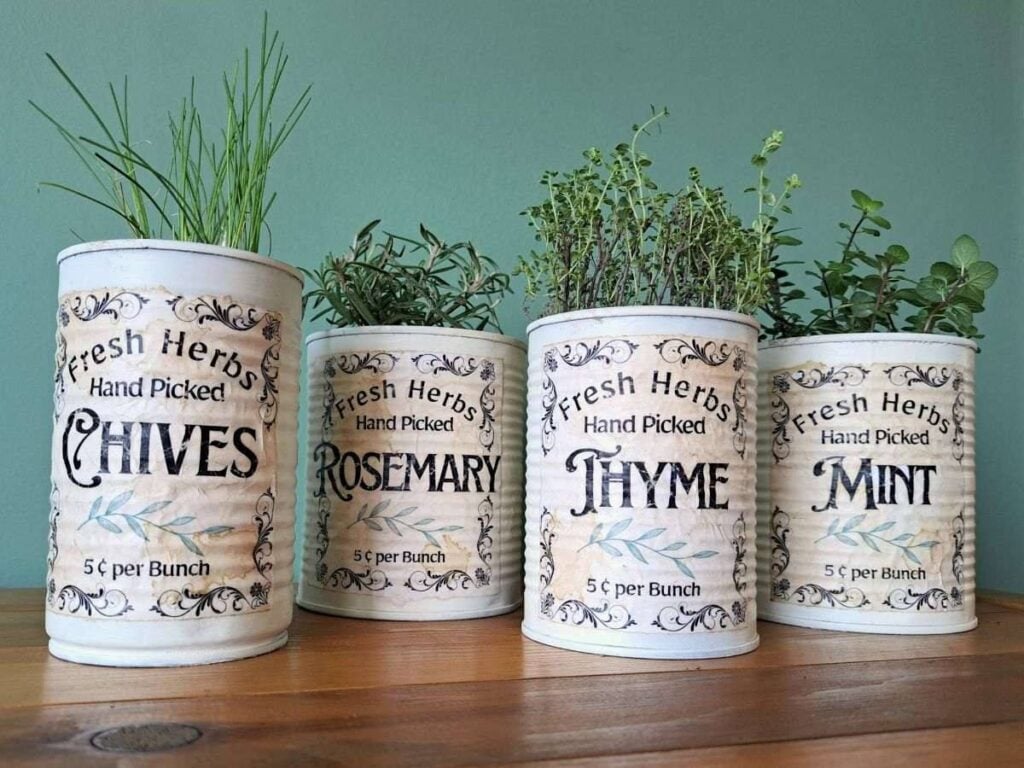
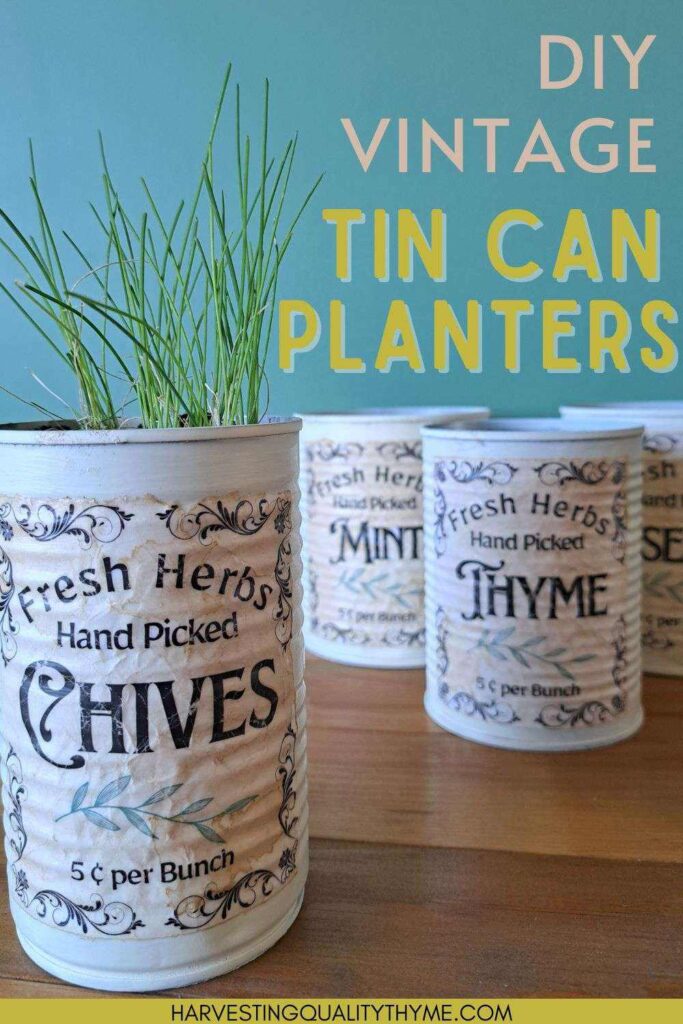
If you enjoy tin can crafts, then you have to give these vintage tin can planters a try. I enjoy recycled crafts because it saves money and helps the environment – win, win.
Plus, growing herbs in tin cans has never looked prettier with these upcycled tin can herb pots!
First, before we even get started, we need to collect some tin cans. I like to use a range of sizes to create some more interest and make it look like they have been collected or thrifted over time.
You want to choose larger cans so you have more room for soil and a healthy root system. Soup cans, diced tomatoes, pasta sauce, and chickpeas or kidney bean size all work great. I would skip the tomato paste or tuna cans though for sure.
Once you have your tin cans picked out, it is time to gather your other supplies…
Supplies Needed:
- Tin cans (range of sizes)
- Nail and hammer
- Rust-Oleum Chalked Spray Paint (Chiffon Cream is the color I used)
- Tin Can Labels (free printable pdf available below)
- Clear Matte Mod Podge
- Sponge brush
- optional: clear matte spray paint to seal everything in at the end if using outside
- Potting soil and herbs for planting
Get the labels that I used for this project here:
You may decide you want to label your herbs differently, or add other embellishments such as ribbon, or jute twine. The sky is the limit so get creative and do what suits your style.
Now that we have all of our supplies gathered, let’s get started!
How to Make a DIY Tin Can Herb Garden:
Step 1: Prep the Cans
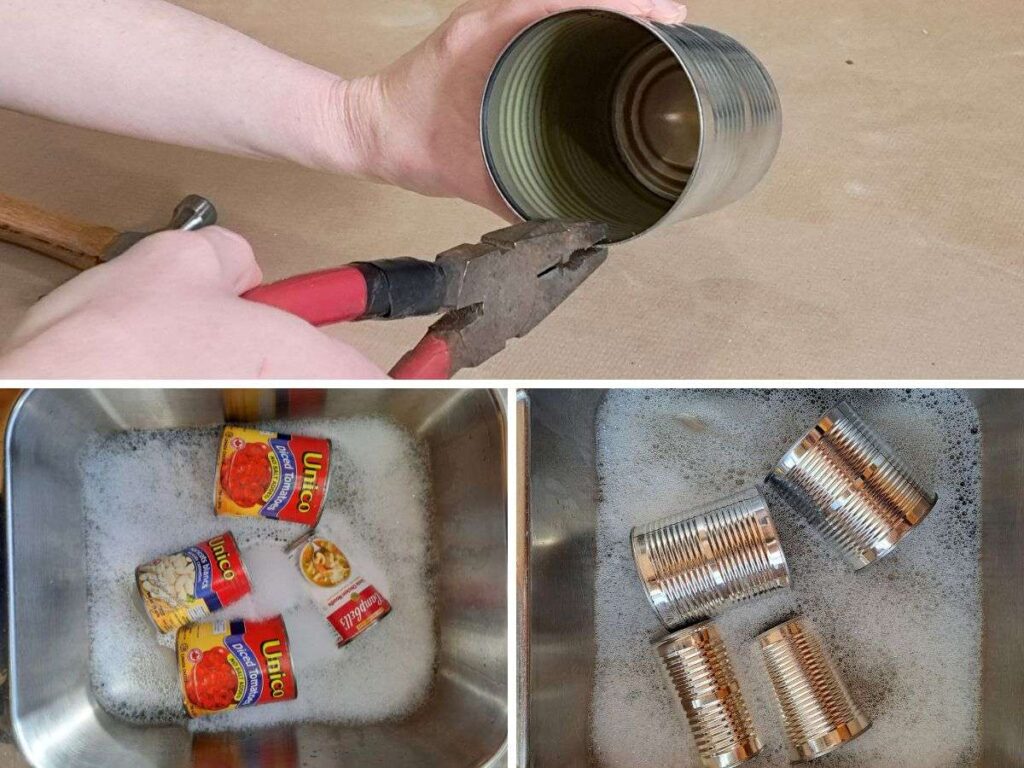
First, take the lid completely off with a can opener. Next, I used some plyers to flatten out any sharp pieces left over.
After that was all done, I gave the cans a nice bath in the sink to remove any food residue, labels, and glue spots. I will admit that I didn’t go too crazy trying to get all the glue off as I ended up putting my herb labels overtop of them.
If you want to get all the glue off, I find that using some type of oil (like coconut oil, or olive oil) really helps.
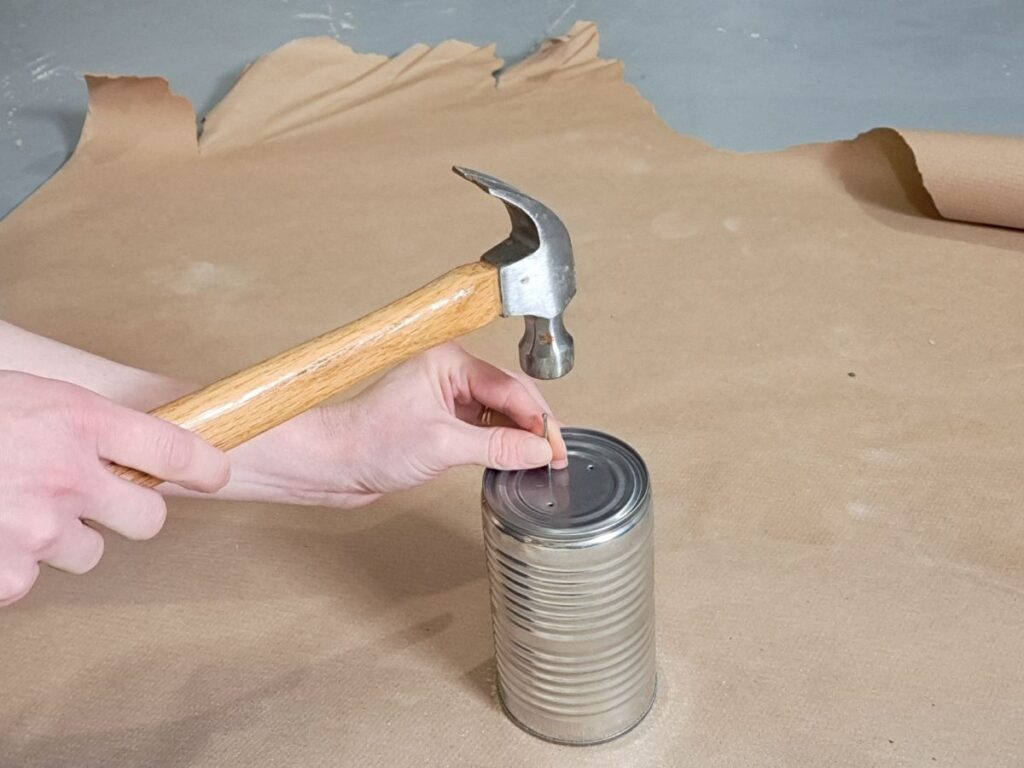
Lastly, I took a small nail and a hammer and added three to four holes in the bottom of each can for drainage.
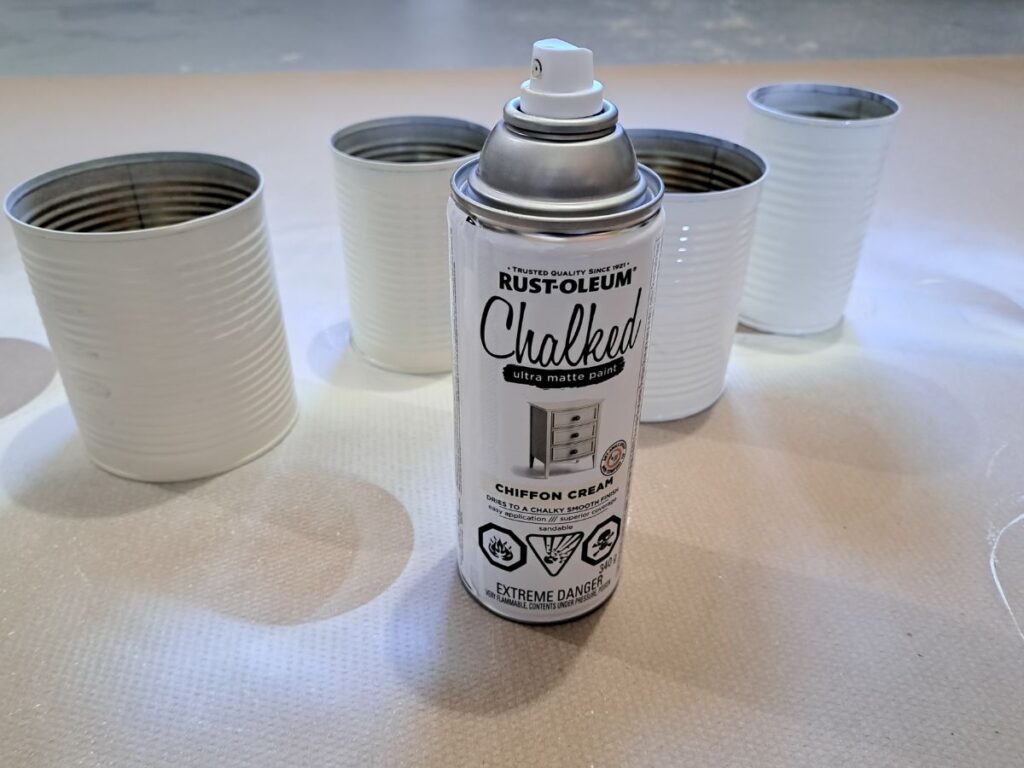
Step 2: Painting the cans
This step actually went super fast with the “chalked” spray paint that I used. I set up in the garage so I had good ventilation, and put down some paper.
I only went over them once, and then just did some touch ups after that and it covered perfectly.
Step 3: Distressing the labels
If you want the same finished look as me, here is what I did to age the labels.
First, I printed them on regular computer printer paper. Next, instead of cutting out each label with scissors I used a ruler at the edges and ripped the paper, like so…
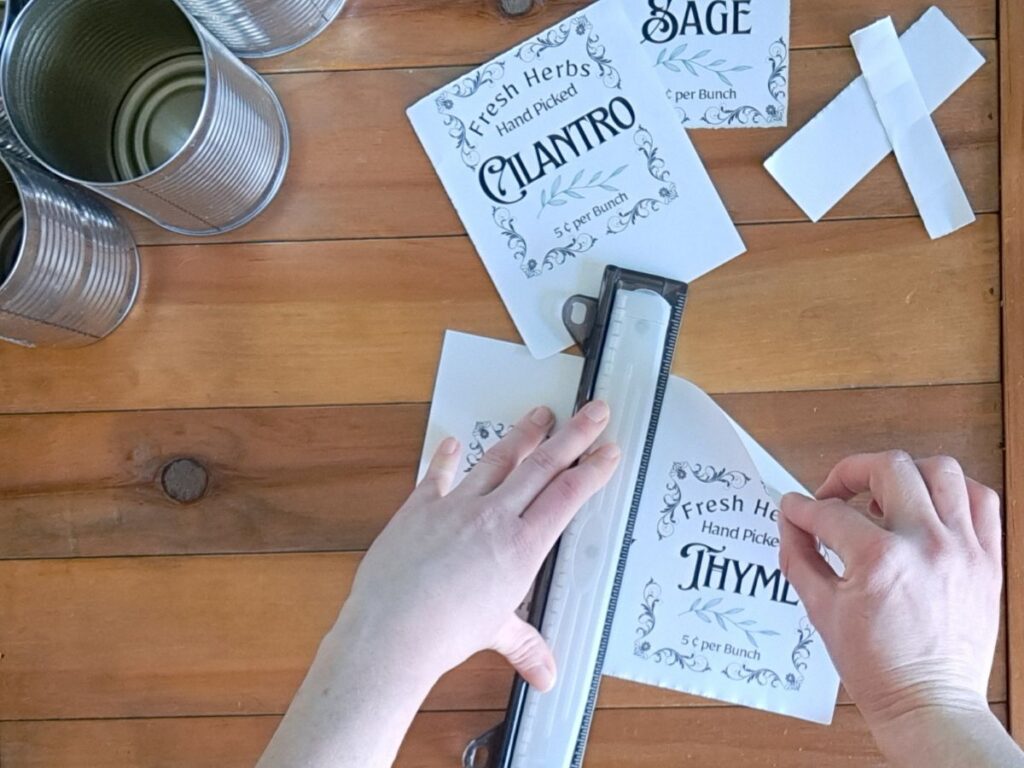
Now this part sounds scary, but just trust me… I balled up each label in my hand, and then gently unfolded it a few times. This adds a creased and crinkled look. Flatten them out as best as you can for the next step. Once you apply them to the cans they will smooth out nicely.
Next, you want to make a cup of orange pekoe tea (yum) and save the tea bag in a small bowl. Use the tea bag like a paint brush and go over the labels a few times letting it dry slightly in between until they are dark enough for you.
I put some parchment paper under the labels for this part.

Lastly, I squeezed the tea bag over the labels here and there to create a few drops which created some darker spots. Let them dry completely before adding to your tin cans.
Step 4: apply the labels
Using a sponge brush apply a thin coat of mod podge to the can. Then add your label over top, and smooth out by pressing into the ridges of the can.
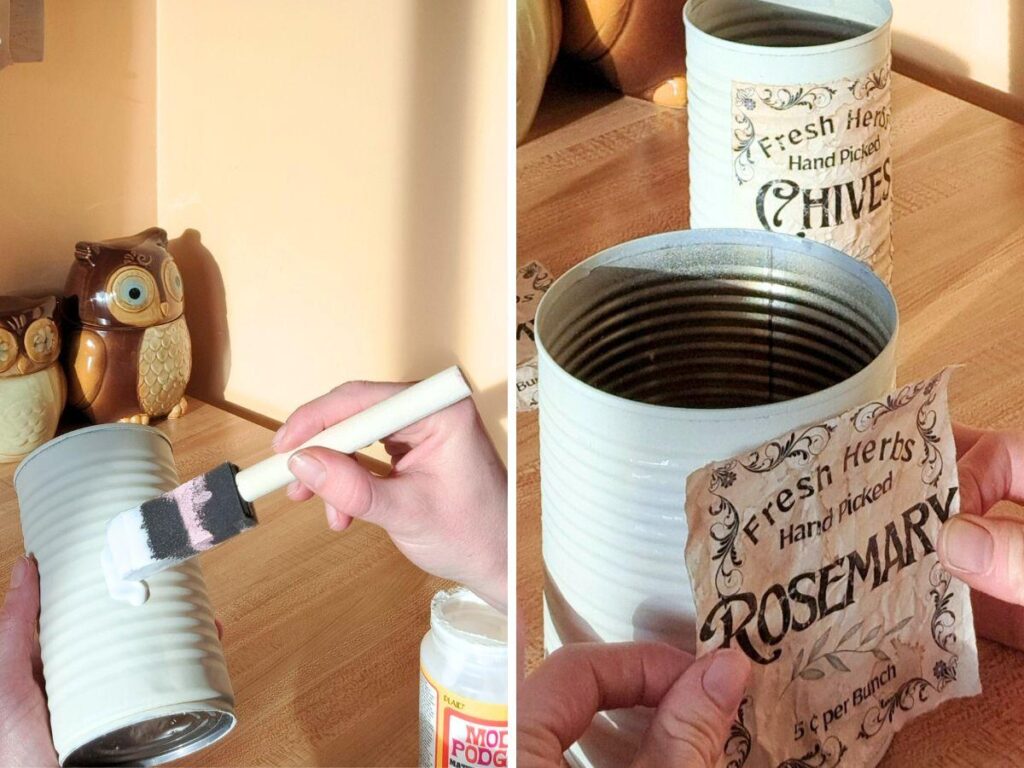
After this, you will want to add up to 3 coats of mod podge over top of the label. Extend the mod podge off to the side of the label and on to the can so the edges are nicely sealed as well.
This will protect against water damage. I am using these indoors, so I wasn’t too worried about it. However, you may want to add a clear matte spray paint over the whole thing when you are done if you are putting them outside.
Step 5: Planting Herbs In Tin Cans
Now it is time to get some herbs in those beautiful tin can planters, and it couldn’t be easier.
Just add soil to about a 1/2 inch from the top, make a hole in the center, and then drop in your herb plant. I would do one small herb per can. Gently pat down around the base of the herb, and then water in.
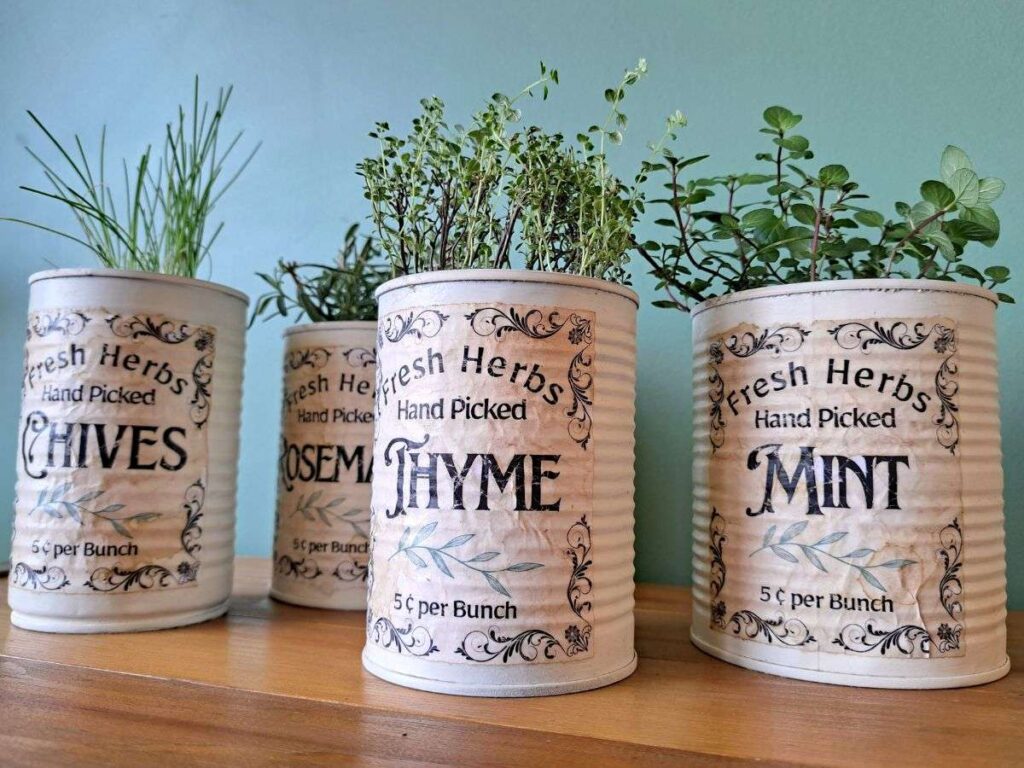
I do not put rocks in the bottom as it limits the amount of soil I can get in there for the roots to grow. Plus, we have drainage holes in the bottom – so it is all good.
Another option would be to add some premoistened soil, and then start your own herb seeds in there.
Maintenance of your Tin Can HErb Garden:
If you are interested, you can read my complete guide to growing herbs indoors that goes in more detail. But, here is the gist of maintaining your tin can herb garden:
- Make sure to give them lots of light (either by a sunny window or by choosing a good grow light)
- Check on your plants daily to see if they need water, and water accordingly
- I place my tin can herb planters in the kitchen sink to water so it catches and drips
- Prune regularly to encourage healthy new growth
- At the same time, never prune more than 1/3 of the plant at once
- Fertilize if the plants are really slowing down in growth, or not looking so hot
Well, that is all there is to it. I hope you give these tin can herb pots a try. Looking for more inspiration? Then check out this post for even more indoor herb garden ideas to try.
Until next time!
Pin for Later!
Leave a Reply