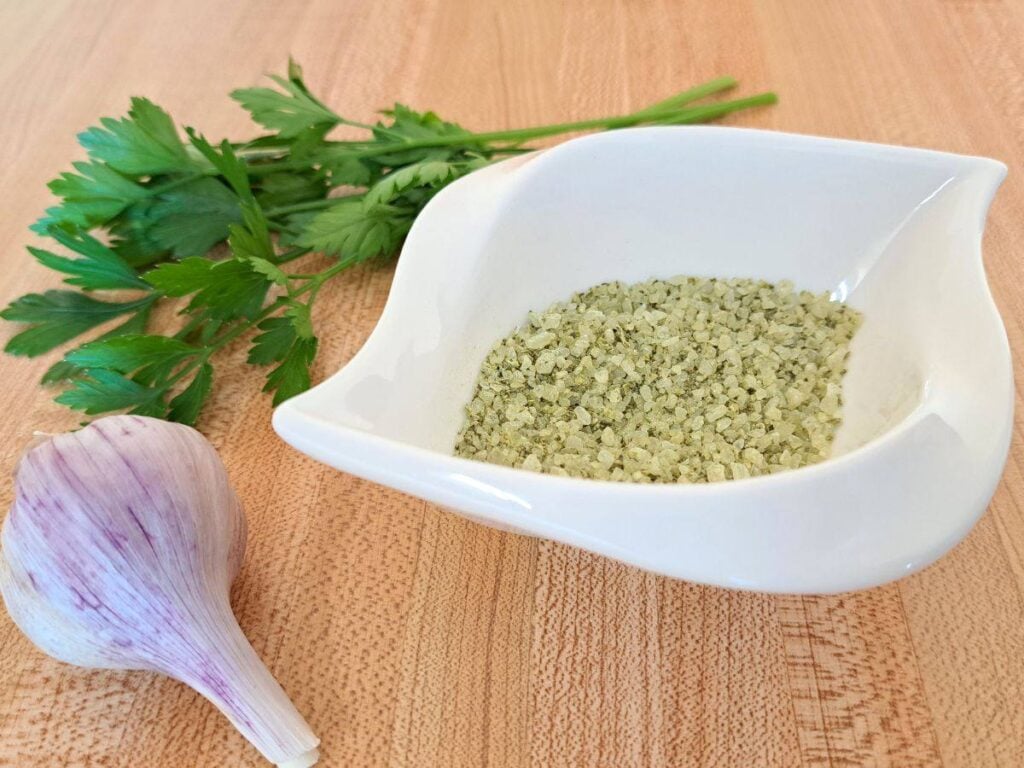
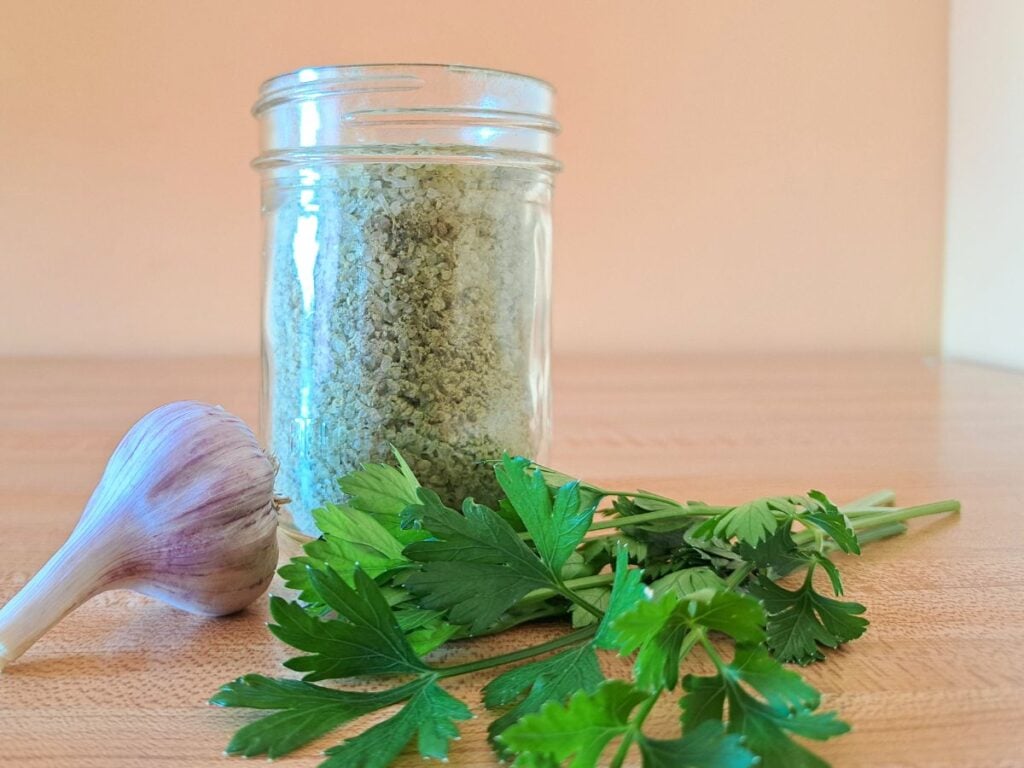
This homemade garlic parsley salt recipe adds such a nice flavor to your food. And DIY finishing salts like this one are a great way of preserving parsley from your herb garden. They make a great herbal flavored gift as well!
All you need is some fresh parsley, garlic, lemon, and a nice coarse sea salt. Couldn’t be easier to make. If you have been searching for some fun ways to preserving herbs, then you have to give this a try.
I have an abundance of parsley in my garden this year as one of my plants went to seed last year and I did not pull out any of the seedlings this spring. I have been having fun coming up with different ways to preserve and use all this parsley.
My husband and I had a yummy sheet pan meal with sausage and roasted veggies the other day. I pulled out this garlic parsley salt and sprinkled it on top of the veggies before serving and wow. What a treat.
I generally try to limit the salt that I use in my cooking, so this is a nice way to add just a little bit in. If I am going to do it, I might as well do it with style. Right?
You might also like this tomato basil salt I made. Stay tuned for more, as I plan on continuing to experiment and try other herb finishing salts in the future.
Why You’ll Love This Recipe!
A perfect way to finish off your meal with a little extra zing. They do call these “finishing salts” for a reason.
Makes a great homemade gift, or could be included as part of your DIY Christmas gift baskets if you like to do that sort of thing.
A fun and easy way of preserving fresh parsley from your herb garden.
You will save money! Buying premade seasonings and spices is way more expensive than if you make it yourself, and you know exactly what ingredients you have put in there.
Ingredients
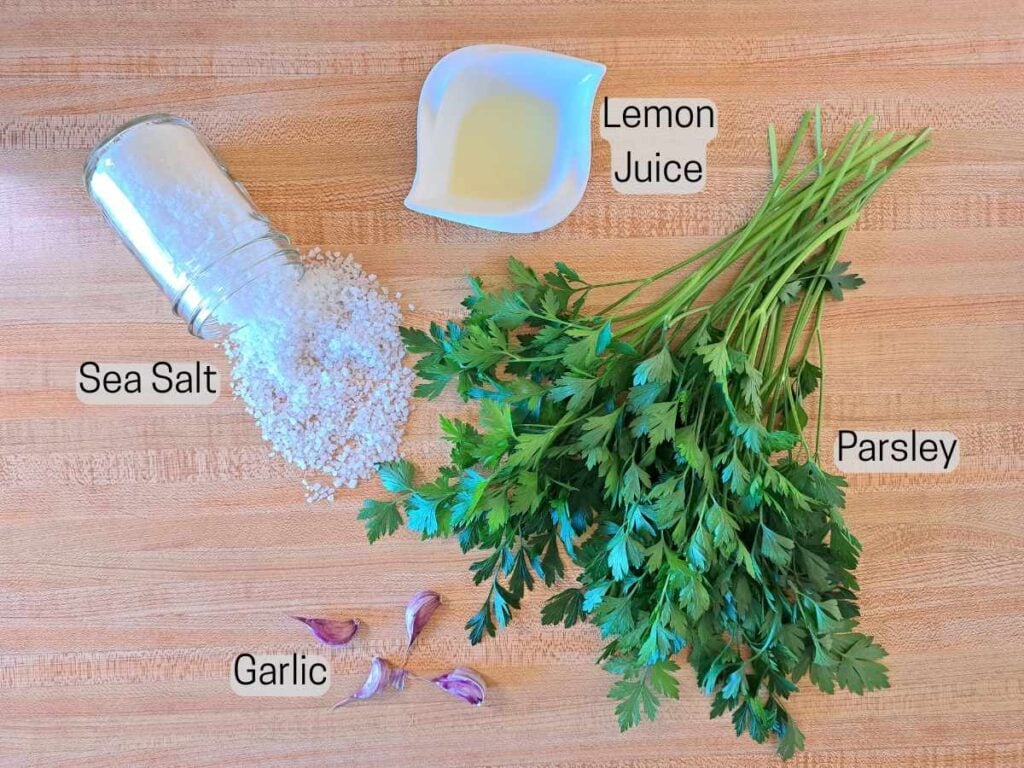
Salt – high quality coarse sea salt is best. You can use a fine sea salt if that is all you have, just make sure to process it a little less so you don’t end up with a powder.
Parsley – fresh parsley from the garden will always be my first choice, but you can also buy fresh parsley from the grocery store. Dried parsley works as well if that is what you have on hand. When using dried parsley you will only need about half the amount.
Garlic – Again, I am happy to use the garlic that I grew in my garden. But you can also use garlic powder. If using dried garlic powder I would just add 1 teaspoon in place of the garlic cloves.
Lemon – I used lemon juice in this salt recipe. Lemon zest from a fresh lemon would be great too.
How to Make Garlic Parsley Salt:
Step 1
First you need some parsley. I like to harvest mine early in the morning before the heat of the day. This way the leaves will be at their fullest and less prone to wilt right away.
You just need a nice big handful of parsley – not quite as much pictured in the basket below.
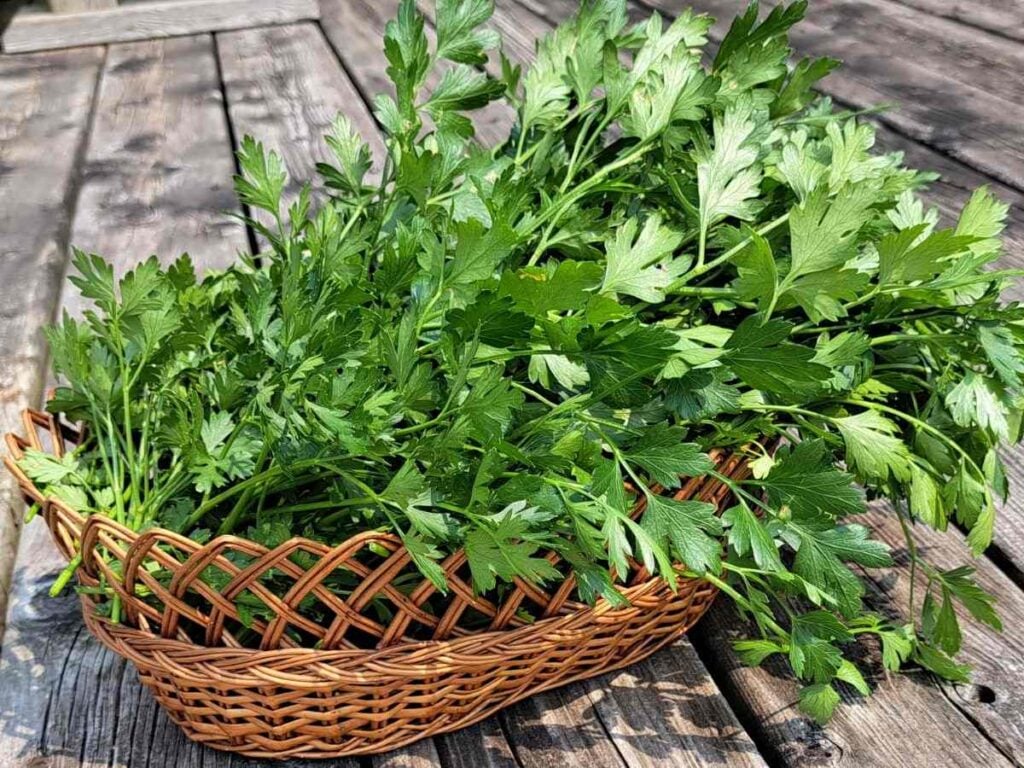
Parsley is a staple in my herb garden as it can be used in so many dishes like white fish in parsley sauce, or parsley soup.
You can easily grow parsley from seed as well, so you will save even more money on your grocery bill.
Step 2
Once you have got your parsley in the kitchen, I like to remove most of the stems so I am left with the leaves. Next, peel the garlic cloves, and grate your lemon zest (if using).
Now is the time to preheat your oven to 170 F, or the lowest setting it will go. This will be to dehydrate the parsley and garlic later on so you salt will store for a long time.
You want to use a lower setting so that you do not destroy any of the beneficial properties or flavor of the parsley and garlic.

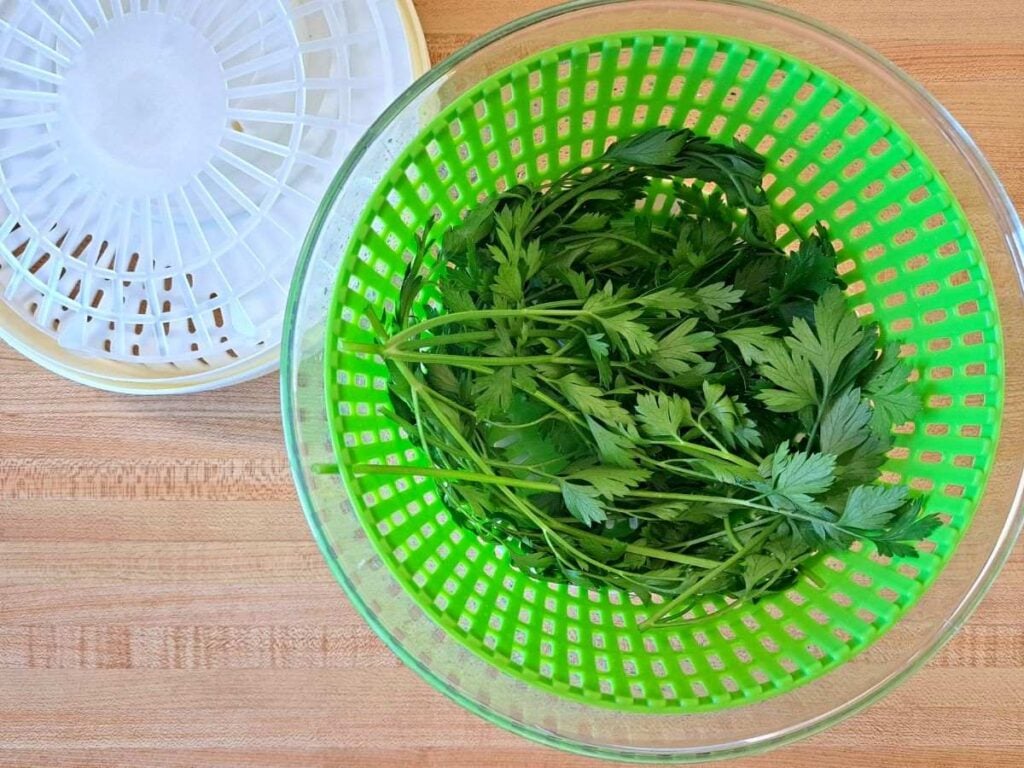
Then wash and dry the parsley leaves. A salad spinner works great to get most of the moisture out. Paper towel works just fine as well.
It is ok if there is still some moisture as we will take care of that later.
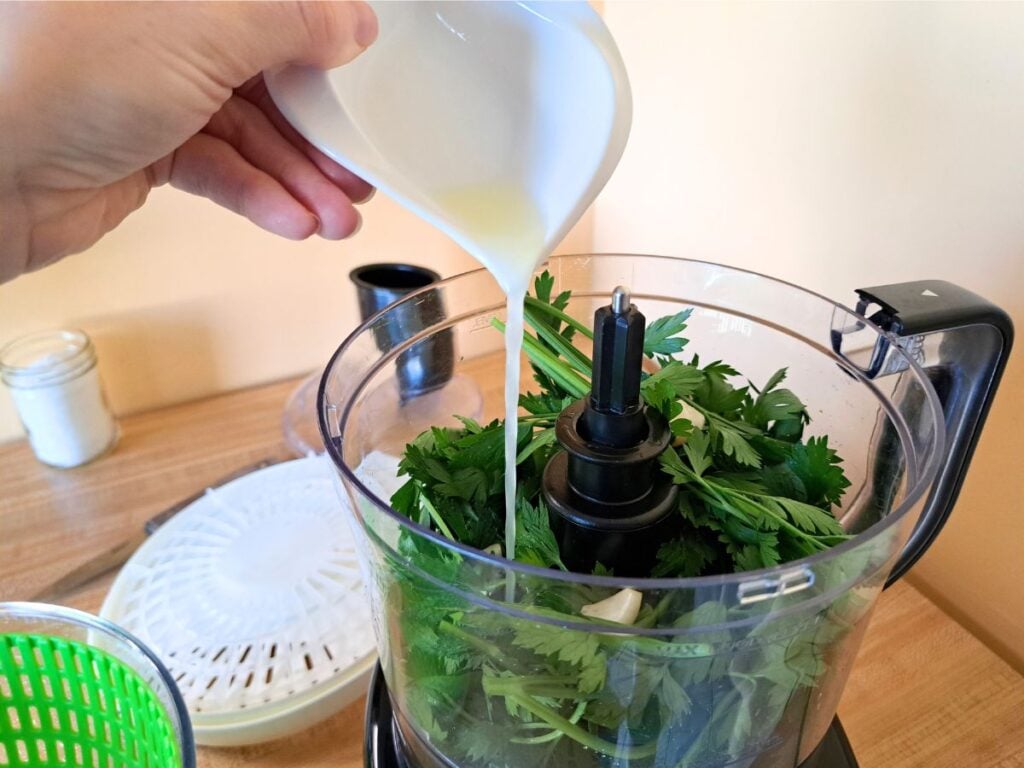
Step 3
Add the parsley, garlic, and lemon juice to a food processor. If you are using lemon zest then wait until later to add it (don’t worry, I will tell you when). With the chopping blade in place, pulse until everything is finely chopped.
You will want to use a spoon to scrape down the sides as well.
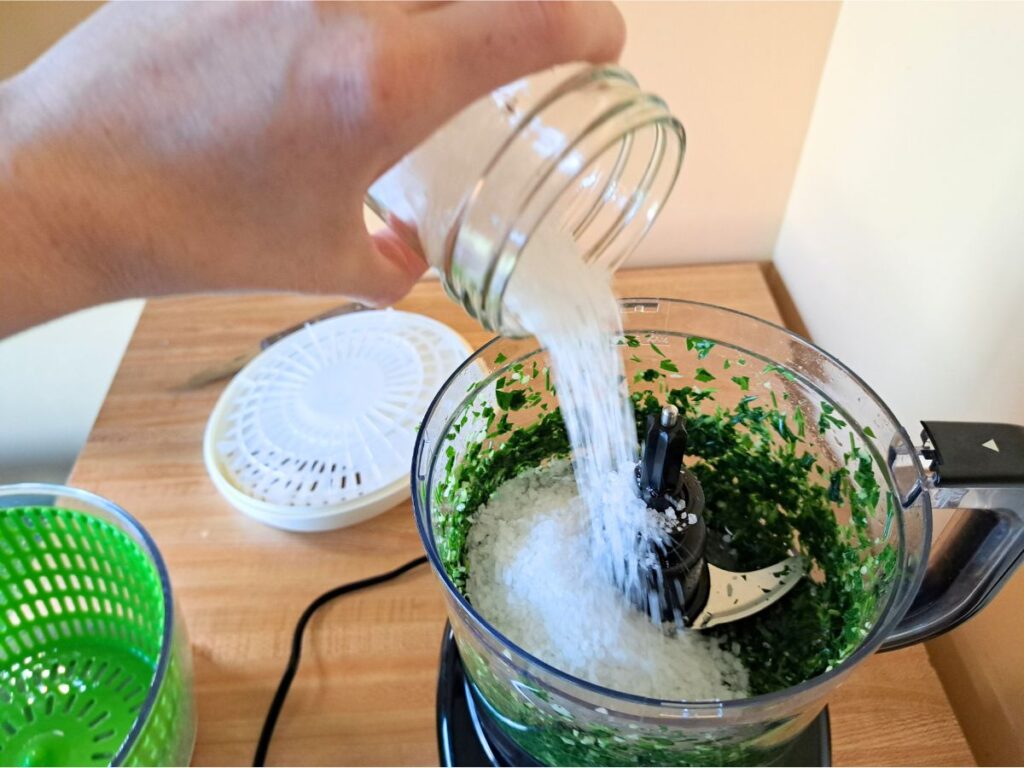
Step 4
Now it is time to add the sea salt and the lemon zest if that is what you are using. I like to add the lemon zest in later so that it doesn’t get chopped up as much.
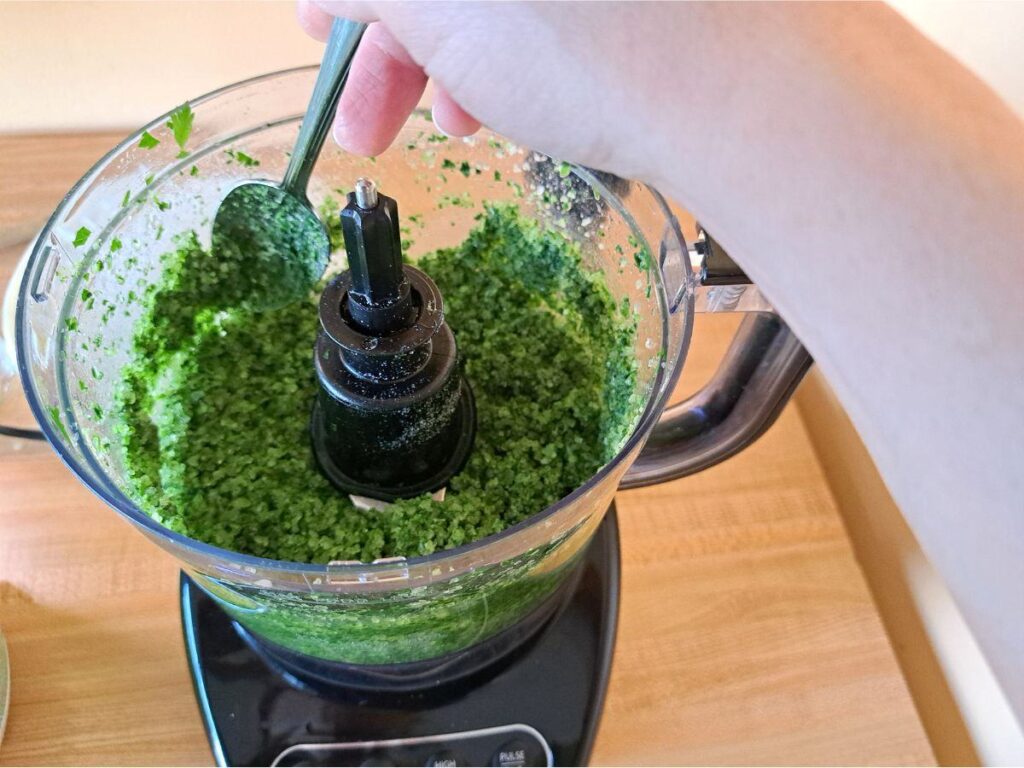
Step 5
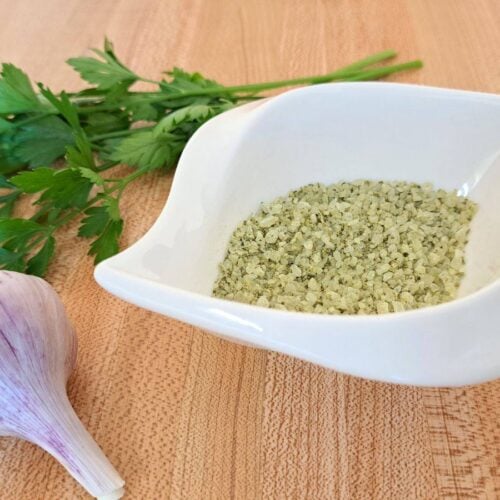
Pulse the food processor again – just enough to mix everything together. The salt will turn green and that is totally normal as the oils and flavor absorbs into it.
If you are using a fine salt don’t pulse too much or your salt will become too fine (almost like a powder). That is why coarse sea salt is best for this recipe.
I found that the sea salt I had was actually a little more coarse then I wanted initially, so I just pulsed it a little extra to get it to my desired consistency.
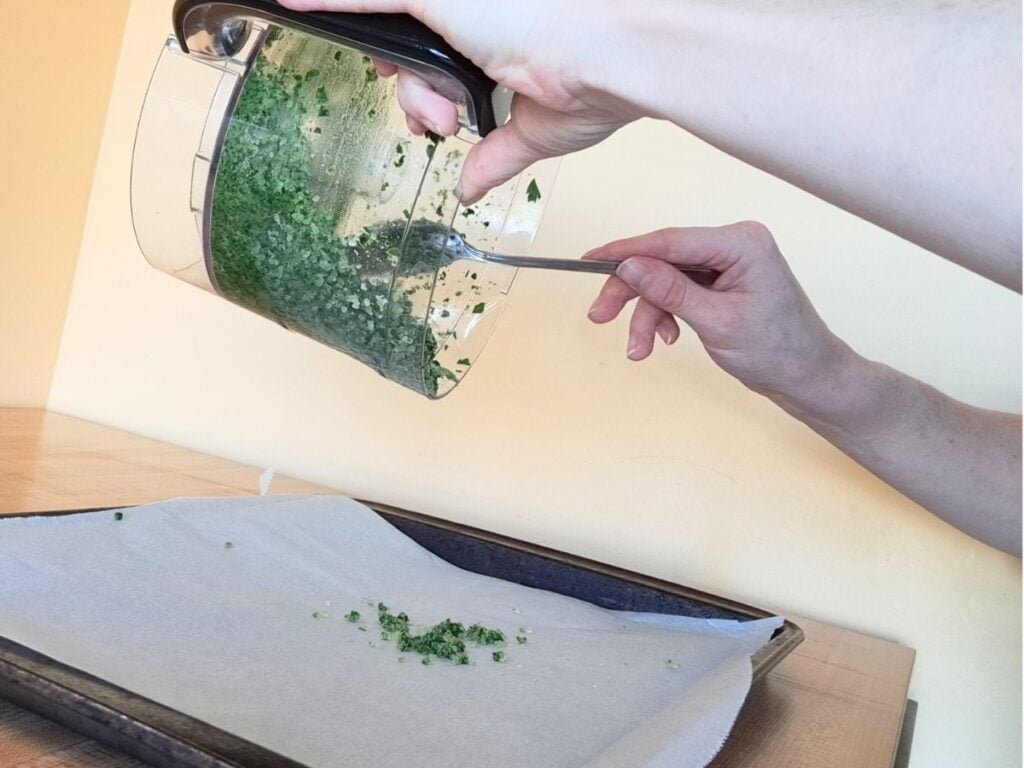
Step 6
Next, spoon the garlic parsley salt mixture in a thin layer on a parchment lined baking sheet.
I baked mine for about a total of 30 minutes. I made sure to give the salt a stir every 10 minutes.
You will know it is done when everything is completely dry and any parsley leaves will be crunchy and crumble easily. It will change color as well and be less bright green.
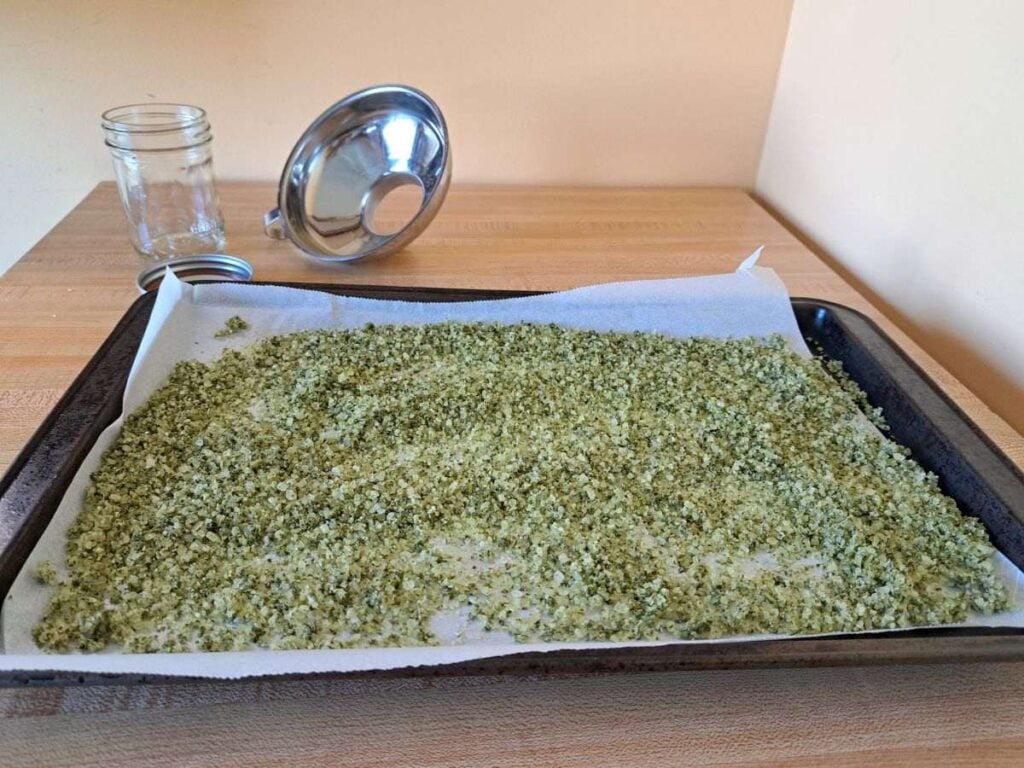
Another option is to cover your baking sheet with a tea towel and let dry for 1-3 days in a warm dry spot of your home. Make sure to move the mixture around every once in a while.
Storing Your Garlic Parsley SAlt
Your parsley must be completely dry and cooled before you store it. It should feel crispy and crunchy and crush easily when pressed between your fingers.
Store in an airtight container for up to one year. I like to use mason jars since that is what I have lying around the house. You could also use old glass spaghetti sauce jars, honey jars, jam jars, etc.
Tips
- It is best to use a coarse sea salt for this recipe so the salt does not become to fine when processing
- I prefer fresh parsley from the garden as it will have the best flavor and color, but if you are in a pinch, then you can use dried
FAQs
1. Should you use fresh parsley or dried for parsley salt?
You can use either fresh or dried parsley when making a parsley salt. If you are going to use dried parsley, then use half the amount called for in the recipe.
2. What is garlic salt with parsley used for?
Garlic parsley salt is a type of finish salt, which means you add it to your food just before you are about to serve it. It adds a great flavor and bit of texture to any meal. You only need a little bit to make a big impact. I enjoy it on roasted vegetables.
3. What is the best way to store parsley salt?
Store this parsley finishing salt in an airtight container in your pantry. You will want to avoid direct sunlight, and any major fluctuations in temperature. Cooler is better. I keep mine in with my other spices.
Make sure that your parsley salt has completely dried and cooled before storing as you do not want any moisture in your container at all.
If stored properly, it will last for one year.
Homemade Garlic Parsley Salt
Ingredients
- 4 cloves of garlic
- 1 large bunch of parsley
- 1 tbsp lemon zest (or 2 tbsp lemon juice)
- 1 cup coarse sea salt
Instructions
- Preheat oven to 170 (F) – or the lowest temperature it goes to, and line a baking sheet with parchment paper
- Wash fresh parsley in cold water, and then dry with a salad spinner or paper towel
- Cut off the thick stems of the parsley so you have mostly leaves
- Peel garlic cloves, and grate lemon zest (if using)
- Add garlic, parsley and lemon juice to a food processor and pulse until very finely chopped
- Add salt and lemon zest (if using) to the food processor and pulse until well combined with the other ingredients (salt will turn green and that is ok)
- Continue to pulse until the salt is your desired coarseness
- Lay out your garlic parsley salt in a thin layer on the parchment lined baking sheet
- Bake for 30-40 minutes, mixing every 10 minutes until the parsley is dry
- Once done, remove from oven and sit on the counter to completely cool
- When the parsley bits are completely dry and everything has cooled, you can store in an airtight container for up to one year
- Have fun experimenting and using it on your homemade meals!
Leave a Reply